Posts

Using Aluminum Cans for Jewelry Making

Image
Materials used :  Aluminum cans Center Punch Metal Shears Browsing Pinterest, I came across some amazing embossed pendants by Tammy Tutterow. She used alcohol inks to color them and then applied a crackle glaze. She also mentioned using aluminum cans for some of the pendants. Hers looked so great, I had to try it out for myself! Here's Tammy's original tutorial that inspired this post and some of the pieces she made: And the follow up she posted with aluminum cans: And here's what I made. From the front, you'd probably never guess that they were made from aluminum cans. But flip them over... Here's what I started with.  I used a center punch to poke a hole in the top and bottom of the can. An exacto knife works, too, though I broke the tip off of a blade trying to do this.  I used metal shears to cut the top and the bottom of the can off. It's pretty thin metal, so you could probably even use regular scissors. ...

Lots of new techniques

Image
I've been trying some new techniques lately. This bracelet was made using two-drop peyote stitch, which is quite similar to regular peyote stitch, but you use two beads at a time (or one large bead) instead of one small bead at a time. And this is the first time I ever attempted herringbone stitch. It's pretty simple once you get the hang of it, and I like the fish-scale look of it. I used antique seed beads I got when I was in Paris for this one. They're slightly irregular in size, but the uniformity of the beads doesn't seem to affect herringbone stitch as much as it does other stitches.

Little round peyote tubes

Image
For awhile, I had been making simple beaded loops for toggle clasps, and then I started using flat round peyote stitch to make the loops, but now I've graduated to tubular peyote stitch clasps. It probably doesn't look much different from flat round peyote in the pictures, but it makes for a much sturdier and nicer looking clasp in person. Basically, you start out with a circle of size 15 seed beads and after working the first three rows, you work rows up alternating sides, slowly adding larger beads to increase the size of the circle, and then you join the two sides at the top. After trying a toggle, I though these little circular tubes would look nice as earrings, so I made a couple of pairs.

More peyote stitch bracelets

Image
I made the base for this bracelet with peyote stitch and then added the blue drops around the edge and the flowers on the top. The large flowers are vintage Swarovski buttons I got in Paris. I also used one of the buttons for the clasp. For this bracelet, I tried tubular peyote stitch with different sized beads in order to make this spiral effect, aka Cellini Spiral . I really like this technique, but I thought the instructions made it sound more complicated than it actually was. It's just circular peyote stitch, and for each row you use three size 11 Delicas, two size 11 Czech seed beads, one size 8 seed bead, and two more size 11 Czech beads. For the starting row, you double the number of each. That's it.

Spiral rope chain

Image
One of my goals for this year was to learn spiral rope chain , so I spent a couple of weeks playing around with it. This was my first attempt at spiral rope. I used larger beads so I could see what I was doing, but after a few spirals, I didn't like the way it looked, so I took it apart. Then I decided to try double spiral rope chain, which I think I like better than plain spiral rope chain. I added bigger beads to the middle of each stitch, so I got a textured spiral. And another bracelet in a different color: The Art and Elegance of Beadweaving has a section on spiral rope chain and mentions several variations to try, one of which has size 15 seed beads at the core of the chain. I liked the small, dense spiral that this created, but you have to pass through the core beads a few times, and I found that size 15 seed beads are just too small for that--they kept breaking. And nothing is more frustrating than when your seed beads break and leave a hole in the piece. So I stopped work...

Seed bead swatches

Image
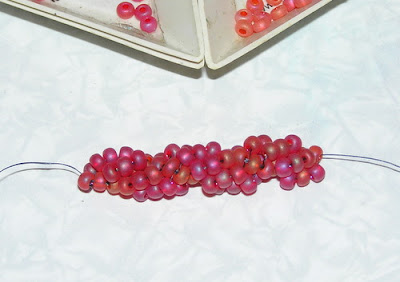
I started to do a lot of projects with seed beads when I got a Beading Bead-a-day calendar a couple years ago. The good thing about the calendar is that it has a lot of different techniques and the instruction cards are a useful size to keep on the table next to you while you're trying something new. One helpful tip I picked up from the calendar was to keep swatches of your seed beads so you know what you've got to work with. As you can see, I've built up quite a palette over the last few years. When I was in Paris, I went to the Marché aux Puces St-Ouen de Clignancourt , a huge flea market, and I found a shop with a huge selection of wonderful vintage and antique seed beads. I just finished making swatches for all of them because although swatches are useful, they're not terribly fun to make. Since older seed beads tend to be more irregular in shape, the swatches look kind of lopsided, so I guess I won't be doing much bead-weaving with them. They'll work as ...

Faux opal necklace

Image
I've been working on this necklace for the past few weeks. I've always loved faux opal (aka harlequin) vintage glass cabochons. I bought some on etsy from both laurenrose and sunshinebuttercup . Once I got all of them, I wasn't quite sure what to do with them, but then I thought that it would be very cool if I linked a bunch of them together to form a necklace. So it started like this. You can see bead embroidery in various stages here. And then I started planning out how it was going to look once I joined them all together. But in the end I decided to place them sideways rather than up and down. Here, you can see that they've been sewn together, I've added pearls around the cabochons, and the sides of the necklace are there, but I haven't gotten to the clasp yet. The colors don't look quite right in the photos I took inside, however, and the pink beads and pearls don't match the cabochons as well in these photos as they do in real life. And here I add...