Polymer Clay Cane with Ripple Blade Tutorial
Materials used:

The Polymer Clay Artist's Guide: A Directory of Mixes, Colors, Textures, Faux Finishes, and Surface Effects contains a wealth of information about polymer clay techniques. I adapted one of the techniques found here to create the following cane, although mine doesn't look as nice as the one in the book. I'll have to play around with this technique.
I then stacked them, alternating silver and translucent clay.
I used the acrylic roller to smoosh the layers together more thoroughly. I then cut it in half and stacked the layers again, rolling them out again. I then used the ripple blade to cut the stack.
I used a bead baking rack for the beads and added a little bit of pearl ex powder to enhance the color.
Here's what the settings looked like before baking.
The bead with the liquid clay coating is on the far right here. It ended up a little lumpy and duller in color than the others. I like the idea of sealing them this way, but I'm not sure how you keep the liquid clay from running.
Here are the settings after baking.
Here's another experiment with this technique. None of the acrylic paint colors showed through here. I think I might be rolling the layers out too thin. Still, you end up with an interesting pattern.


- AMACO Craft Clay Machine
- Sculpey Acrylic Clay Roller, 8-Inch
- Sculpey Polymer Clay, 2-Ounce, Translucent
- Sculpey Polymer Clay 2 Ounces-Silver
- Martha Stewart Pearl & Metallic Acrylic Craft Paint Set-10 Colors
- Silver Leaf Sheets
- Sculpey Super Slicer
- Kemper Klay Kutters Circle Set
- Jewelry setting
of your choice
- Bead Baking Rack
- Kato Liquid Polyclay 8 Oz clear
- Jacquard Pearl EX Powder Pigments (32-Color Set)
- Resin
The Polymer Clay Artist's Guide: A Directory of Mixes, Colors, Textures, Faux Finishes, and Surface Effects contains a wealth of information about polymer clay techniques. I adapted one of the techniques found here to create the following cane, although mine doesn't look as nice as the one in the book. I'll have to play around with this technique.
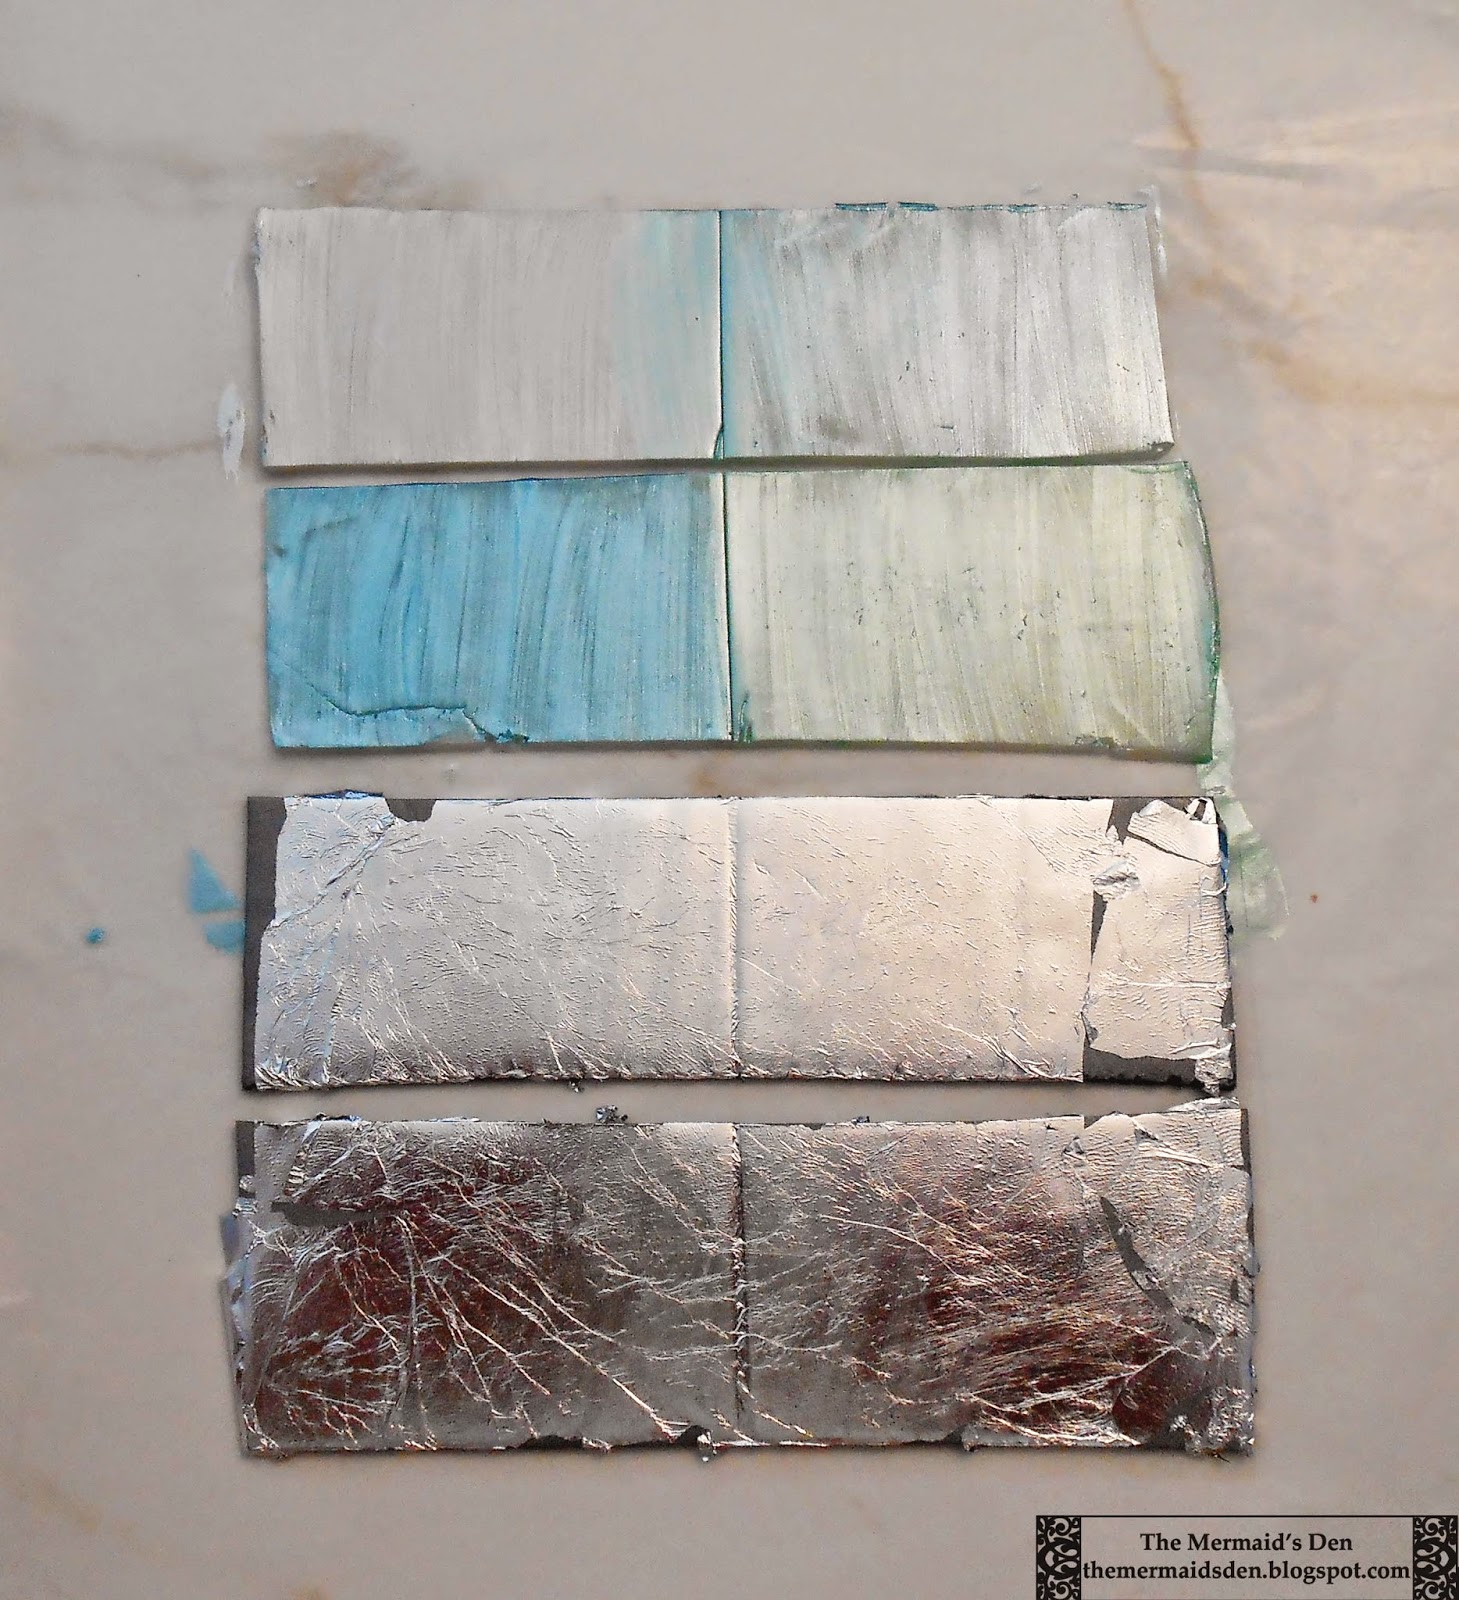
First, I rolled out some sheets of translucent Sculpey and silver Sculpey using the pasta machine. I applied the pearl acrylic paints to the translucent sheets and the silver leaf to the silver sheets. Be sure to let the paint dry thoroughly. I ended up with eight sheets roughly the same size.
I then stacked them, alternating silver and translucent clay.
I used the acrylic roller to smoosh the layers together more thoroughly. I then cut it in half and stacked the layers again, rolling them out again. I then used the ripple blade to cut the stack.
That left me with these. In the book, more colors show through the layers, but all I really got was a hint of blue.
I flattened it out with the acrylic roller.
I made beads with the circular cut-outs and embedded the clay in metal settings.
I used a bead baking rack for the beads and added a little bit of pearl ex powder to enhance the color.
I also added Kato liquid polyclay to one of the beads and on top of the clay in the settings.
The bead with the liquid clay coating is on the far right here. It ended up a little lumpy and duller in color than the others. I like the idea of sealing them this way, but I'm not sure how you keep the liquid clay from running.
Here are the settings after baking.
And then after a layer of resin, which smoothed out the craggy appearance above. They look a bit like faux labradorite!
Here's another experiment with this technique. None of the acrylic paint colors showed through here. I think I might be rolling the layers out too thin. Still, you end up with an interesting pattern.


